Answers Excel → PDF
How to convert Excel to PDF without cutting off columns
Short answer: columns get cut off because Excel prints your sheet at a fixed width, and any column past the right margin falls onto a separate strip of pages — or gets clipped when you also force the height to fit. The manual fix is to rotate to landscape and shrink the page to fit the width; the cleaner fix is a tool that measures the real column widths and lays the whole sheet out to fit. CrazySmartPDF does the second automatically.
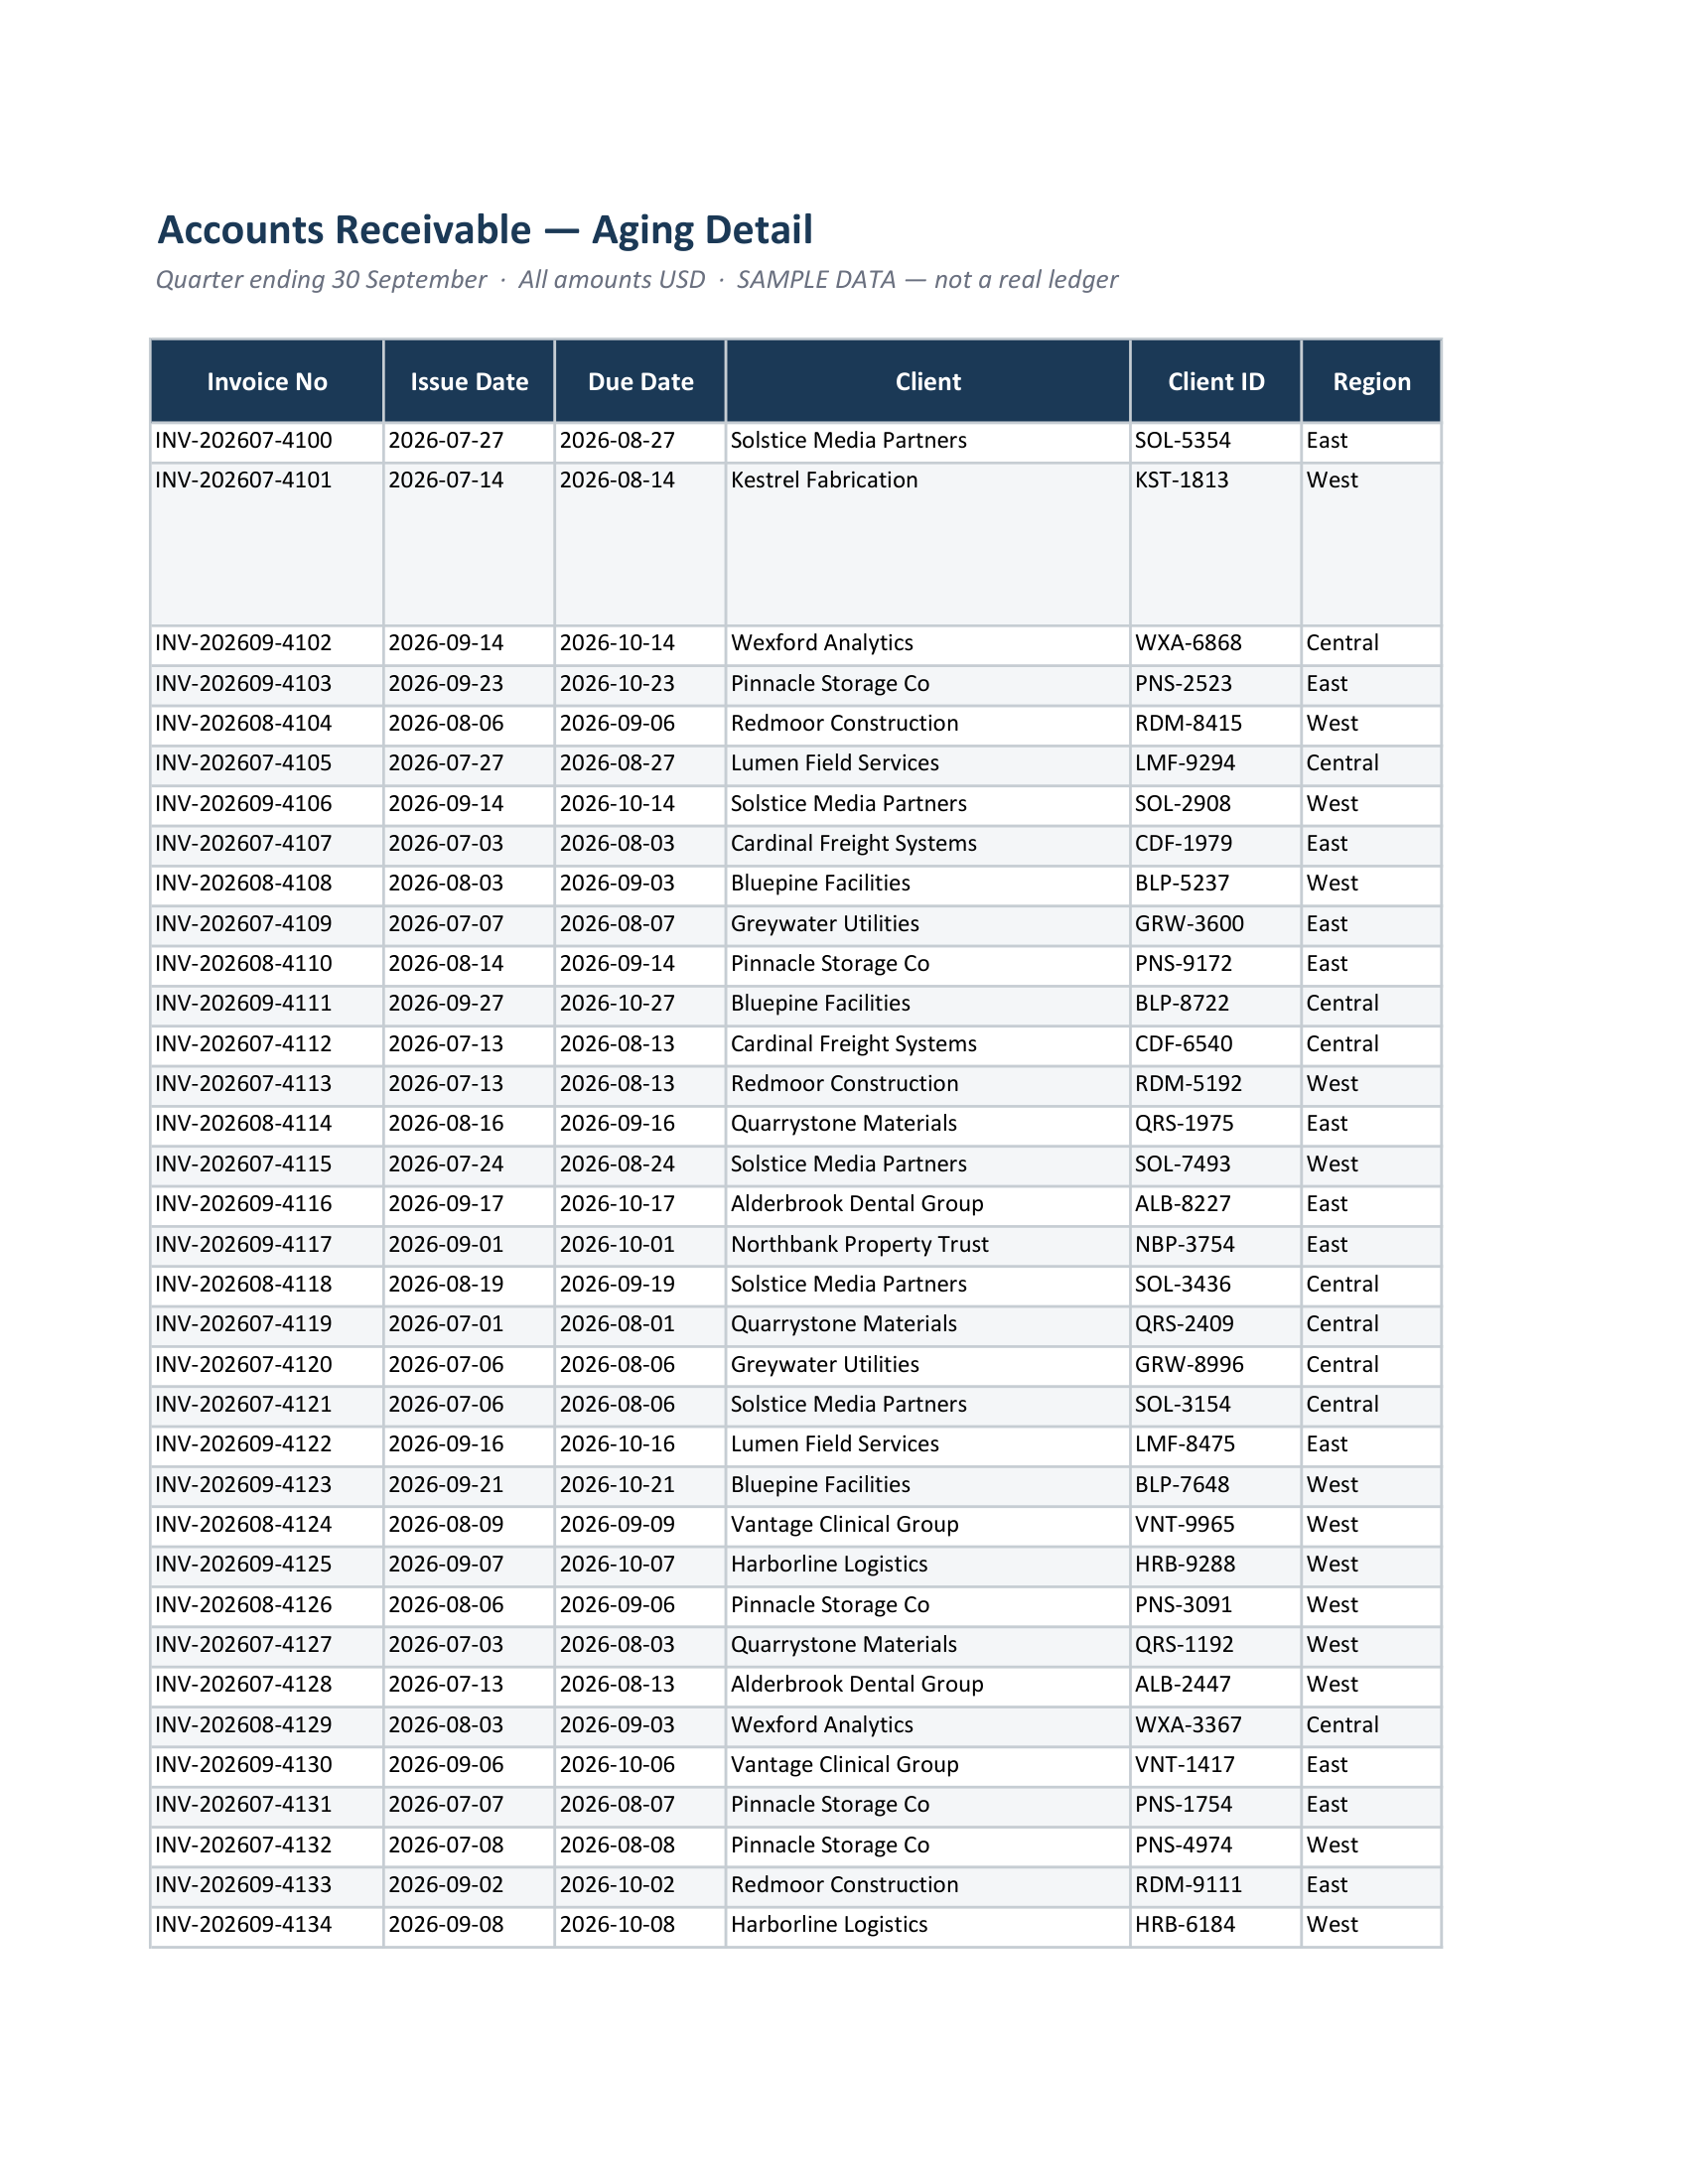
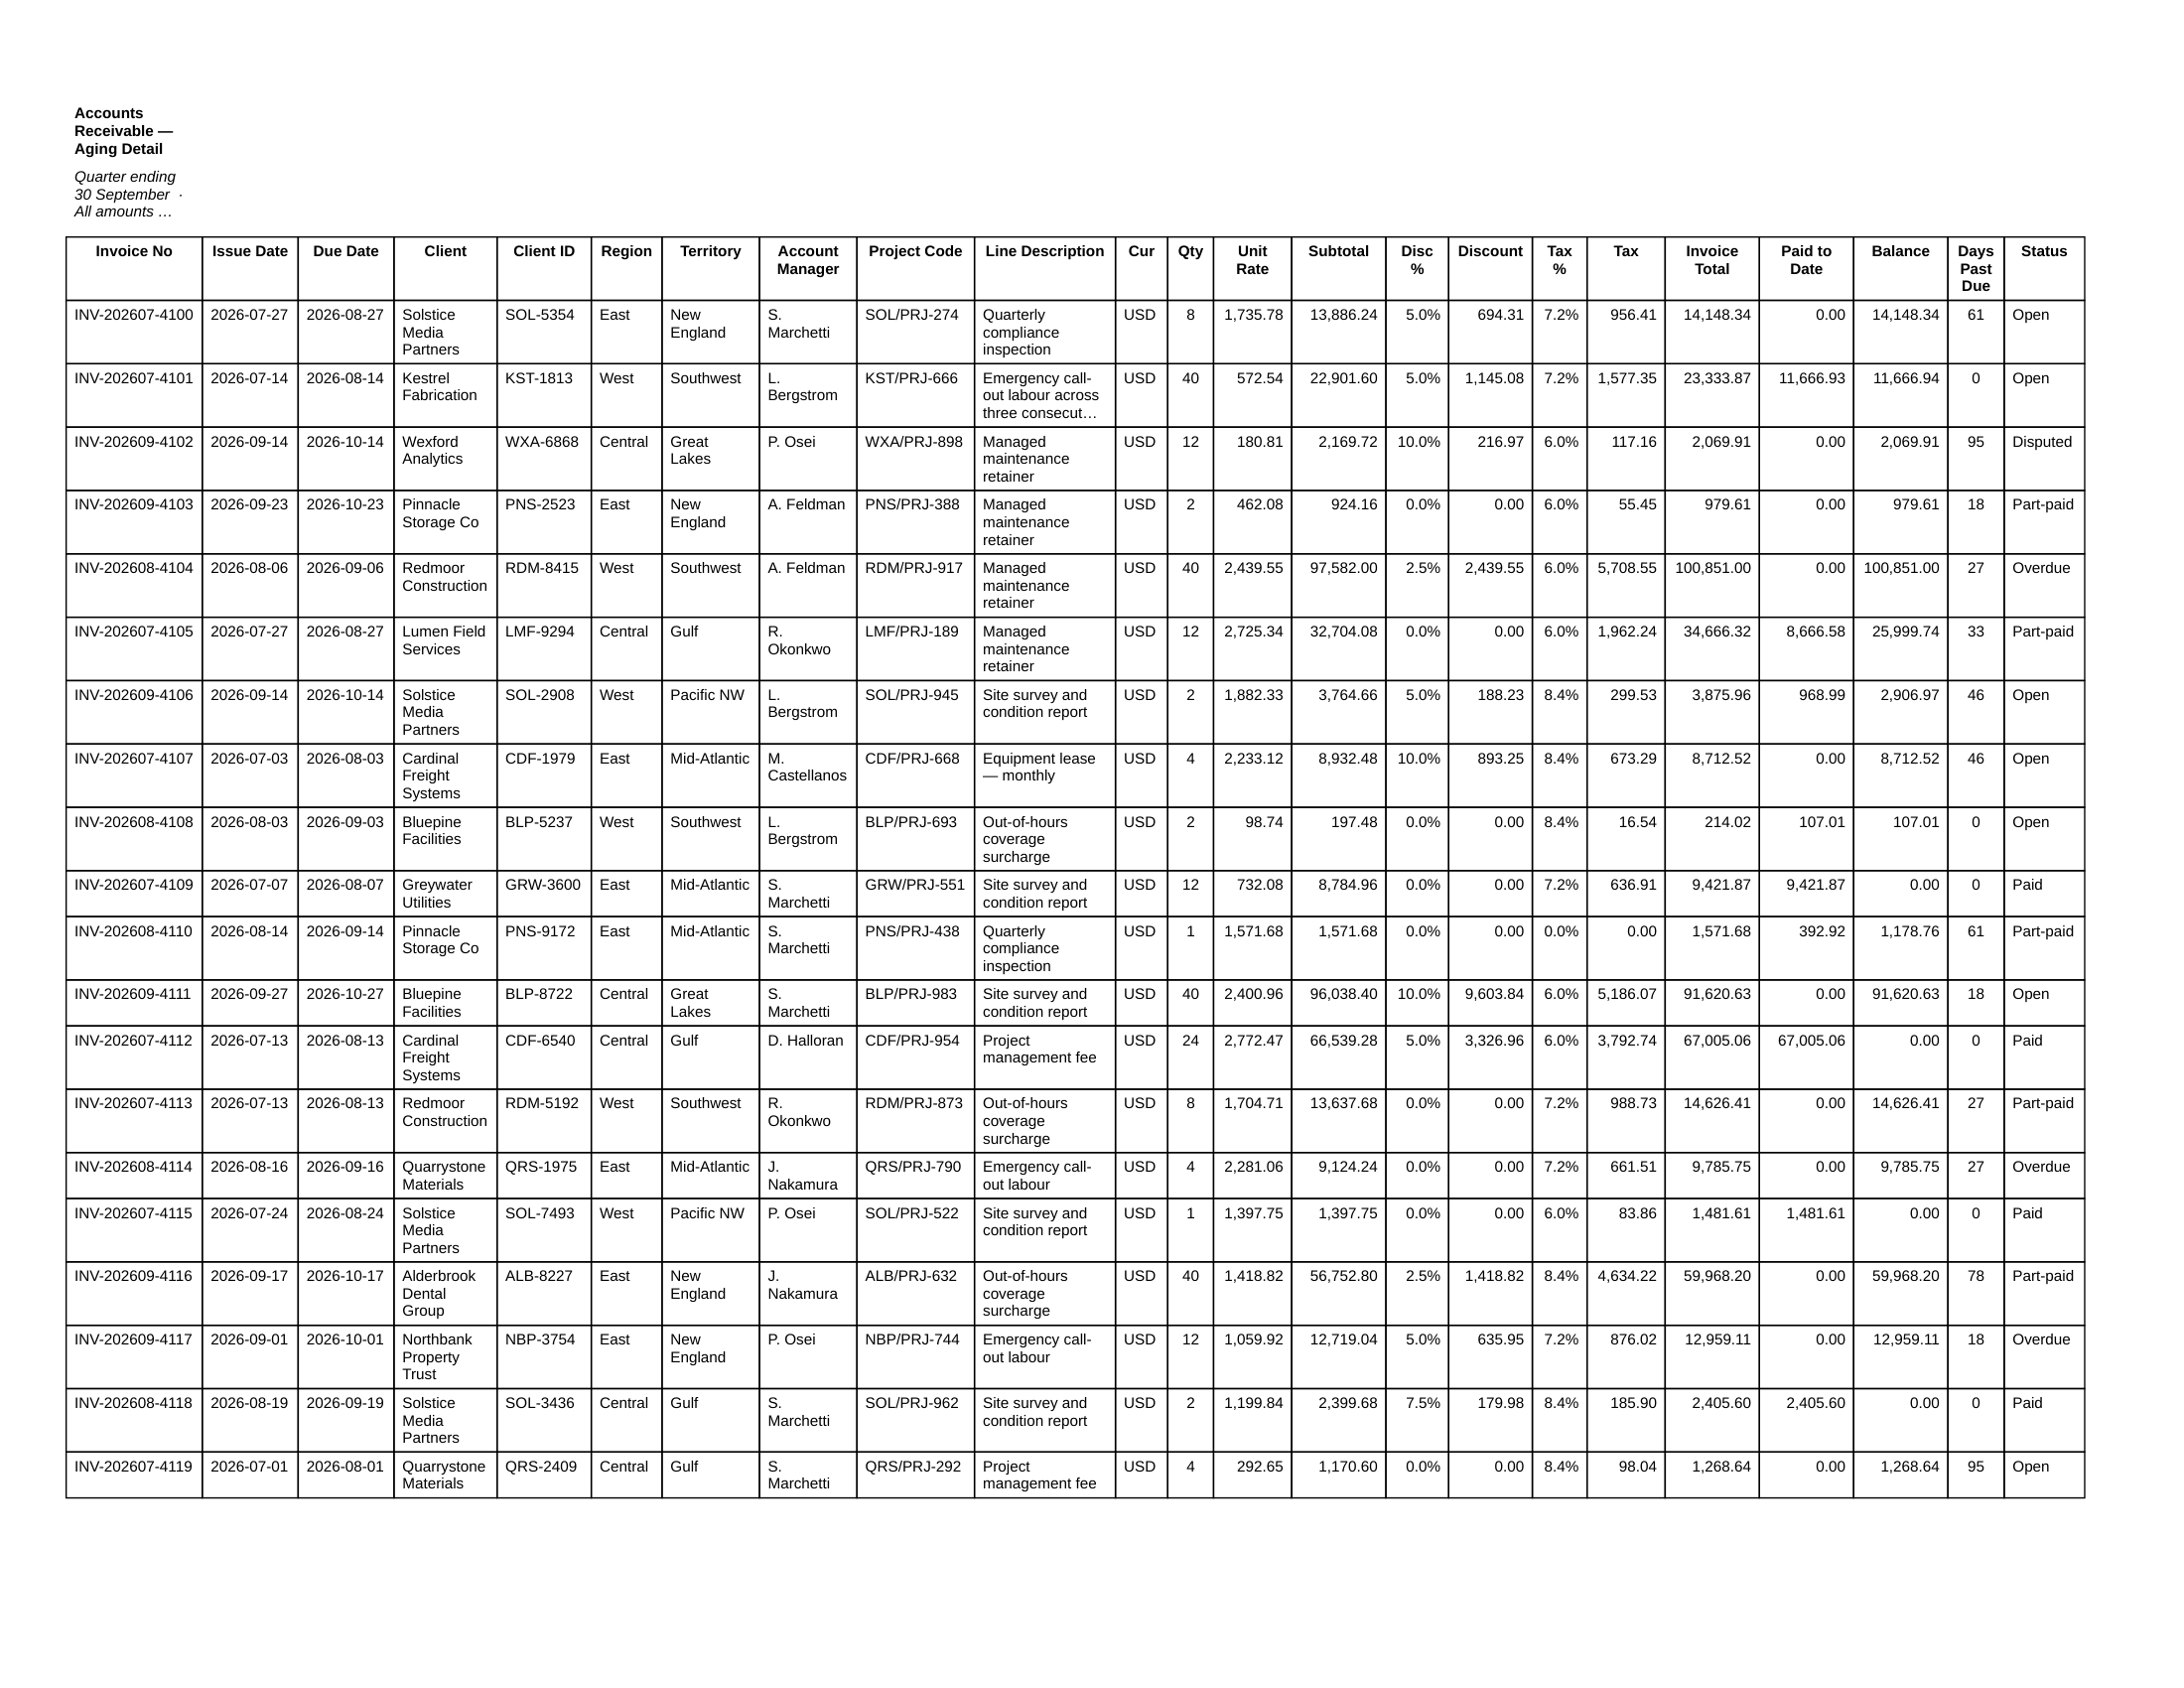
What the cut-off actually looks like
Excel · Save as PDF · page 1 of 24
CrazySmartPDF · page 1 of 10
Fixing it by hand in Excel
You can usually stop the cut-off without any extra software:
- Page Layout → Orientation → Landscape. A wide table almost always wants landscape.
- Page Layout → Margins → Narrow. Narrower margins buy you real width.
- Page Layout → Scale to Fit → Width:
1 page(leave Height on Automatic). This fits all columns across the page — but be warned, on a wide sheet it shrinks the text to do it. That’s a separate headache: see how to save Excel as PDF without shrinking the text. - View → Page Break Preview. The blue lines show exactly where the cut falls; drag them to see what’s spilling.
The honest catch: every one of these is manual, one file at a time, and “fit to one page wide” trades a clean cut-off for unreadable text. On a genuinely wide table you’re stuck choosing which problem to have.
How CrazySmartPDF handles it
Instead of printing at a fixed width, it re-lays-out the sheet:
- It measures every column’s real content width, then picks portrait or landscape automatically based on how wide the sheet actually is.
- It fits the columns to the usable page width at a readable size. For a genuinely too-wide table, rather than clipping or crushing everything into nothing, it slices the table into parts across pages and repeats the first (label) column on each slice, so every column lands somewhere you can read it.
- As a backstop, it rasterises the finished PDF and flags any page where content still touches the right edge, so a clip can’t ship unnoticed.
The honest caveats
The full slice-and-self-check render needs Excel on Windows (Excel 2016 or newer) — the add-in and desktop app have no Mac build. The free web converter on the home page runs the same smart engine on our server — your file is converted, then deleted (never stored) — and does the same fit-and-slice layout row-atomic; the right-edge self-check is what the Windows add-in and desktop app add. That self-check flags a suspected clip for you to verify; it doesn’t silently reshape your data. And the add-in and desktop app only ever read your workbook — your .xlsx is left exactly as it was.